

When I write a blog travelogue, I often want to show you the location of a particular place. There are many better ways to look than to input a general map as a photo.
It's just moving Google Maps directly from Google Maps to HTML mode!!!
Does it look difficult?
But! Once you know it, it's really easy to attach a Google map.
Also, how to optimize mobile by adjusting the size,
Also, I will tell you how to attach the street view.
Here we go.
A. How to attach a Google map to your blog
B. Attach Google Maps (size adjustment, mobile optimization, center alignment)
C. How to attach a Google map (how to view street views, how to attach)
A. How to attach a Google map to your blog
Search for the first place you want on Google Maps.

This is the Google Map search result of Gyeongbokgung Palace in Seoul that I searched. Of course, it is also good to take screenshots and provide them. However, if a blog visitor has visited there in person, it is difficult to estimate his or her location and destination on a screenshot map. It's because I can't enlarge or adjust the direction. How nice would it be if you could open Google Maps with just one click?
In order to attach Google Maps, you only need to follow 5 steps!
1. Press the share button on the Google Maps sidebar!

2. In the pop-up sharing window, press the map scoop button!
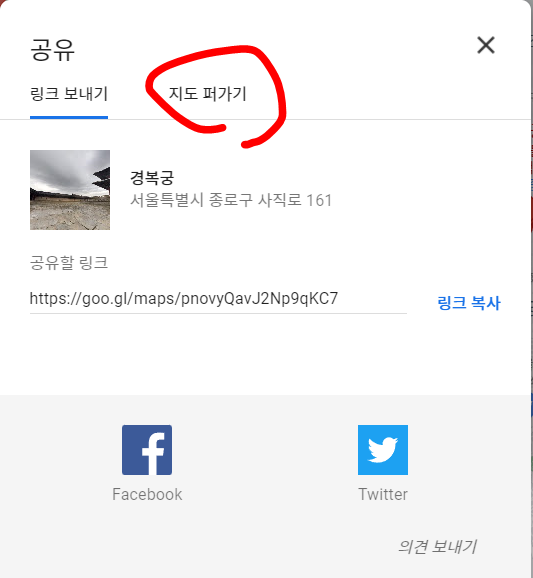
3. Press the HTML copy button!

4. In the blog writing tool window, change the default mode to HTML mode!

5. Paste it into the empty space (Ctrl + v)!
Ta-da! I have attached a Google map.
It can be enlarged and reduced and moved on both PC and mobile. When you click on the big map view, the Google Maps Internet window appears or you can connect directly to the Google Maps application.
B.Attach Google Maps (size adjustment, mobile optimization, center alignment)
1.Adjusting the size of Google Maps
The basic size is medium. Click "Middle" next to the HTML code and the adjustment window will appear. You can choose to copy small or large. You can also choose a customized size that allows you to adjust the size you want.

Check the maximum width and set it to the maximum if you want to set it to the maximum. It fills the screen from side to side. Set the desired size and press the HTML copy button to finish!

First copy the HTML code of any size and you will see the height and width (shaded part) as above.
width="800" height="600"
<iframe src="https://www.google.com/maps/embed?pb=!1m18!1m12!1m3!1d50591.32098707125!2d126.94202207910156!3d37.57961700000001!2m3!1f0!2f0!3f0!3m2!1i1024!2i768!4f13.1!3m3!1m2!1s0x357ca2c74aeddea1%3A0x8b3046532cc715f6!2z6rK967O16raB!5e0!3m2!1sko!2skr!4v1648043574849!5m2!1sko!2skr" width="800" height="600" style="border:0;" allowfullscreen="" loading="lazy"></iframe>
It means 800 wide and 600 high, respectively. If you take it in medium size from Google Maps, it will be 800,600. Just change the number to the size you want! If you want to customize it, what? The maximum width!
2. Optimize Google Maps Mobile
Actually, I emphasized the maximum width, but I usually use a different method. Enter 100% immediately. The maximum value of mobile may be different. When you look at photos and Google Maps on mobile, they are automatically adjusted and printed.
width="100%"
<iframe src="https://www.google.com/maps/embed?pb=!1m18!1m12!1m3!1d50591.32098707125!2d126.94202207910156!3d37.57961700000001!2m3!1f0!2f0!3f0!3m2!1i1024!2i768!4f13.1!3m3!1m2!1s0x357ca2c74aeddea1%3A0x8b3046532cc715f6!2z6rK967O16raB!5e0!3m2!1sko!2skr!4v1648043574849!5m2!1sko!2skr" width="100%" height="600" style="border:0;" allowfullscreen="" loading="lazy"></iframe>
Whether it's mobile or PC, it's filling up everywhere. If you fill it up like this, you don't need to align it in the middle.
3. Sort in the middle of Google Maps
It's really easy! Put <center> and </center> at both ends of the pasted Google Maps HTML and that's it.
<center>Google Map HTML Code</center>
If you leave out the slash (/) at the end of the sentence and type center, all the sentences will be sorted in the middle!
4. Resolving Google Map Enter Problems
Once you're done, sometimes the cursor doesn't occur up and down the Google Maps. In other words, even if you press enter, the space does not open. This is because the space disappeared in the process of attaching Google Maps from HTML.
HTML space code
<p> </p>
So, please put <p> </p> on top and bottom of Google Maps HTML. The meaning is just blank, and if you press enter in basic mode, HTML generates that code.
<p> </p>
You don't have to memorize it. If you press the enter even once while writing the content, you will see countless of that code countless times. If you do Ctrl+C, Ctrl+V, that's it!
5. Google Maps First Screen Map Replacement
It's the same Gyeongbokgung Palace, but there's a huge difference. The top picture is a wide topographic map, but the bottom picture is a narrow satellite map. Visitors to the blog can change it themselves, but it would be better if the first screen you encounter right away was cooler, right?
The Google Map scoop takes the current screen that the user is looking at.
In other words, change the Google map to the desired composition and map format, and press the map scoop to finish!
C. How to attach a Google map (how to view street views, how to attach)
The era of 2D has gone, and the era of 3D has come. There are even glasses that guide you using augmented reality. You can get information from the street view that you can't get from a simple floor map.
In this episode, we will learn how to view street views and how to attach street views.
Here we go.
1. How to watch on a PC.
Search for the desired location on Google Maps. The location is Gyeongbokgung Palace again this time.
Look at the red pencil!

Click on the yellow human shape at the bottom right and you're done! Street View is activated as soon as you click it.
2. Attach Street View
First, open a street view where and where you want it. Then, get the composition you want. This is because the composition you are looking at is attached as it is.
0. Open the street view and get the angle!
1. Click on the 3 dots on the top left!
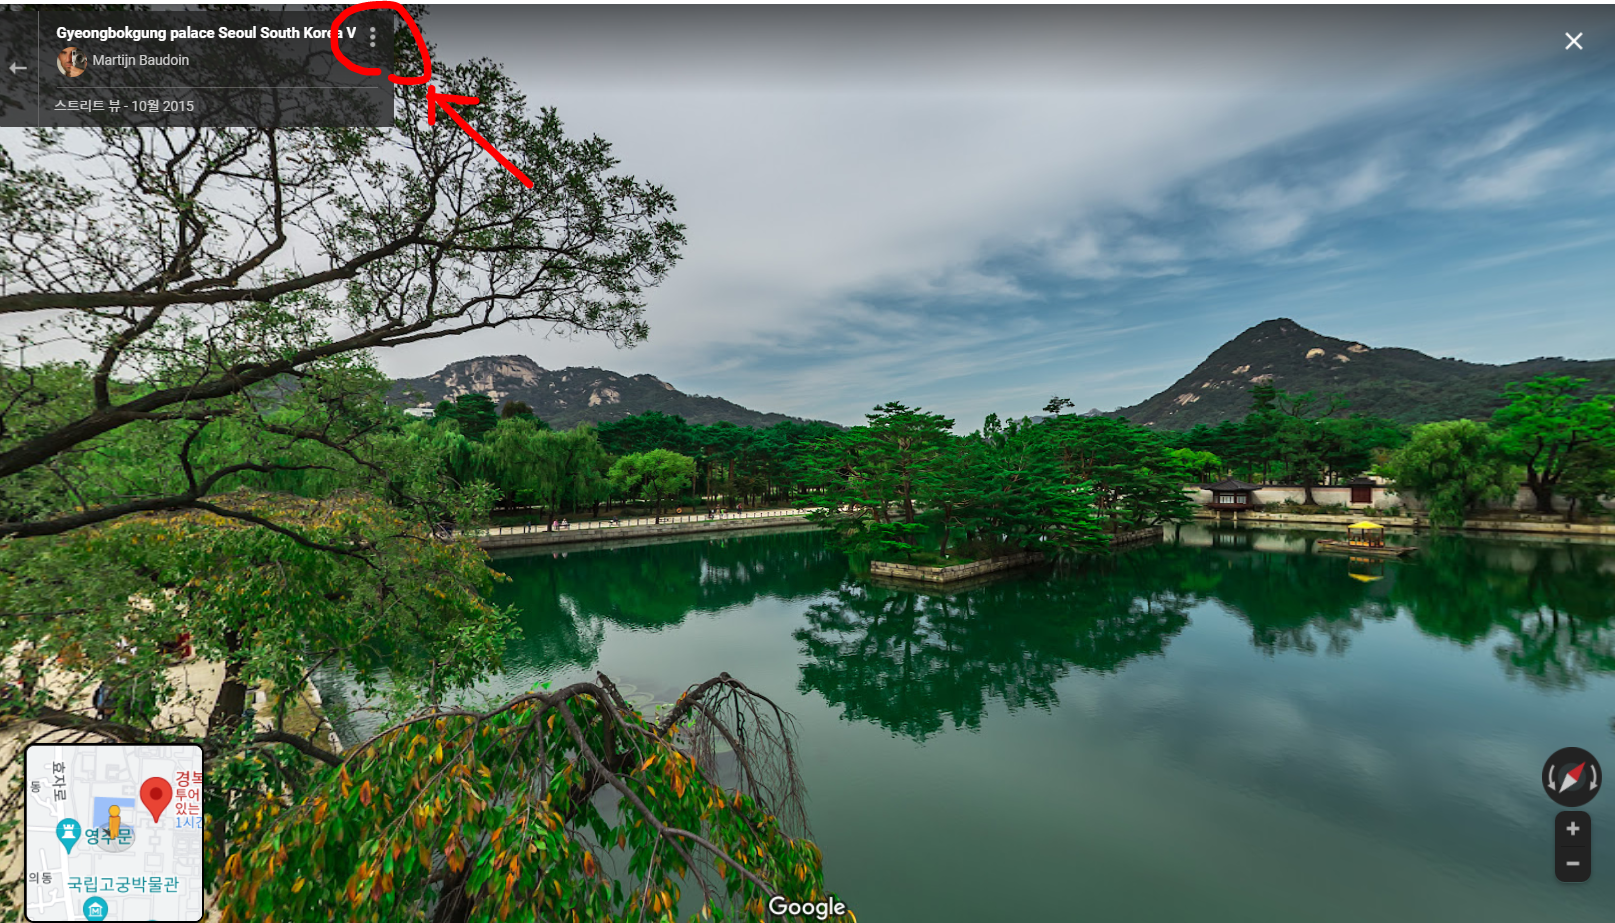
2. Click Share or Insert Image!
3. Click on the map!
4.Click HTML copy!
5. Change to HTML mode!

6. Paste it into a blank space (Ctrl + V)!
<iframe src="https://www.google.com/maps/embed?pb=!4v1648045294648!6m8!1m7!1sCAoSLEFGMVFpcFA1OTdOQzBfbTFFNjlEVVJqNHNiRkJUV0toWjk2X2o3UmZKVTBX!2m2!1d37.5792353252012!2d126.9756136115718!3f320!4f0!5f0.7820865974627469" width="600" height="450" style="border:0;" allowfullscreen="" loading="lazy"></iframe>
Ta-da! I've attached a street view! If you've seen the attached Google Map, the entire posting, you can see that the process is almost the same.
When I was writing a travel journal posting, I really wanted to attach an overseas map. So, I wrote down the contents of my studies. I'm done posting Google Maps-Streetview.
Thank you.

![[BLOG] How to attach a Google map to your blog](https://blogger.googleusercontent.com/img/b/R29vZ2xl/AVvXsEgjhgdcAOzbENof7D8moHCUoxT_sKpYlQCgY57n-s_3TDpVf3nUJ6f5oVJSay41QkD6QAB-X9OChdcchSQ3e-035qwHjqDHbuehQN8ft2AdMO0Lhpo3t6vio7f1KrRJO8uR7oqwUkund1aYcwg1f9HWJSOHkNm1-zJSM4zV74xvToDiiztKqAsXre3U/w72-h72-p-k-no-nu/Gyeongbokgung.PNG)


Post a Comment
0 Comments